I promised to share how I made my wall word out of vinyl without a stencil cutting machine...
but...
first and foremost...the JunkFest Girls would like to extend a heartfelt Easter greeting to all of you! Whether this is a special Christian holiday for you, or not, we want to remind you to take some time today to REFLECT.
Reflect on the goodness in your life and the family and friends that surround you.

On to the "home made" wall words. I don't have a die cutter and have an ongoing offer from a Junk Sista to cut anything I need. But of course I was a bit impatient and decided to give a few small projects a try.

With an exacto knife I cut through the paper into the vinyl. Make sure you use a cutting board for this!! (for some reason I missed a picture of this step) After you've cut along every line, remove your paper and look over the word or number to make sure you've cut through the vinyl as well.
Now peel away everything BUT what you want to use.

You'll notice here that I'm not so steady with the exacto knife. This is where the die cutter's have the advantage, but for a quickie job I decided this will do for now.

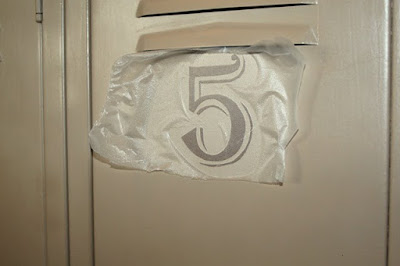
Here's the trick to this project. Press'n Seal. (no endorsement intended) If you've ever used vinyl wall words you know that there's a top and bottom layer over your vinyl. The press'n seal acts as your top layer. Rub it over the vinyl, then you can peel off the adhesive backing.


Press'n Seal - what a fab idea!! That's got to be cheaper than the Cruicut transfer paper I've been using. Thanks for the tip! Love those lockers, by the way. :)
ReplyDeleteThank You for the tutorial..Press'n Seal..Genius..Happy Easter and I can't wait to try this out..
ReplyDeleteJanet
Brilliant! I'd been trying to come up with an idea of how to do this - thank you for the instructions! ~Leena~
ReplyDeleteLove the added touch on your lockers....just what they needed! What a great idea with the Press 'n Seal!
ReplyDeleteGreat addition to your lockers. I love the Press and Seal option. I've used clear contact paper.
ReplyDeleteExacto knife? I'm wondering how I could smuggle one into my house without my husband confiscating it. Just because I have a short attention span and have been known to cut things OTHER than my art projects...seriously, that's why they make bandaids, right?
ReplyDeleteThis is cool.
My daughter has been wanting to take the 12 door locker I have in my garage. I may have to renege on the 'yes' answer I gave her over the weekend. This looks so neat.
Wow-- press n'seal and 'Xacto knife... may give this one a try!
ReplyDeletethe lockers look fantastic too, btw.
What an awesome idea Missy and the numbers are the perfect addition to these lockers! Love 'em!
ReplyDeletepress & seal? I never would have thought to use that! thanks, great tip!
ReplyDeletewww.minnesotajunker.blogspot.com
You are just too freaking smart!!! LOVE this!
ReplyDeleteAnd since I missed an Easter greeting...HAPPY MOTHER'S DAY!
Press - n - Seal... GENIUS!!! Gorgeous!
ReplyDelete;-D robelyn
What an awesome suggestion Missy and the numbers are the perfect accumulation to these lockers! Love 'em!
ReplyDelete