Saturday, July 14, 2012

Before & After

Can you stand just one post about a factory cart coffee table?  Ok, good!  Industrial furniture has been on the home decorating "scene" for some time now.  I think we have Restoration Hardware to thank for introducing us to the ever coveted factory cart, as well as the sticker shock that accompanies the grand delusions of buying one from them! You can also find industrial pieces in Pottery Barn, Home Decorators, and Ballard Designs to name a few, but you'll still be shelling out a few bucks there as well.


Imagine (as I reminisce) the sheer joy and squeals of ridiculous delight as an overhead door to junk heaven opens and this baby is the first thing in sight.  MY sight....junk sisters were behind me, so I called dibs on this one!


That was two years ago, and she has finally made her debut in my living room!  What took me so long?  JunkFest....that's what took me so long!  Every junker knows you don't actually get to your own stuff until.....well...two years later. Or longer.


When I finally did start working on her, I was faced with the dilemma of what to do with the old planks on top.  It was one of those love/hate things.....I LOVED the patina of that old, weathered wood.  It definitely had a story to tell.  But I HATED the thought of bringing it into my home.  To use.  Everyday.  Because I knew I would have to seal all of that lovely worn wood in order to put our feet on it, or eat on it.  Yes, it happens....sometimes at the same time.  Don't judge.  Anyway....as I said, I loved the patina of that old wood, and sealing it would ruin the character.  Seems like a crime, doesn't it?


So I decided to remove all the old planks and try my hand at distressing new lumber, so that I would feel better about mine and my family's feet resting comfortably on that new wood.  No slivers for my loves. And, I could use the weathered wood for something else...that we would not eat off.


 Yes, the pictures are blurry.  It happens when you're excited.  Just wanted to show you how she looked with the posts attached.  I felt really bad about removing those too, but I got over it quickly.  They're not conducive to t.v. watching. 


Here she is, resting comfortably in my living room...just waiting for the feet.


 Ah...yes! There are the feet!  And lanky legs of the resident tweener.


I wanted to add some height, so I found some square lumber (technical term) and adhered it under the newly stained and slightly distressed planks.  If you've never distressed anything (intentionally) I highly recommend it.  It's cheap therapy.


 I'm in love with the wheels. Now that they're clean.  And stained & poly'd.


 The whole thing got a coat of walnut stain.  Then I waxed the wood several times and called her good.


This is one of my favorite before/after's. Probably because I get to keep this one.  But now I have to get to work...JunkFest is just around the corner!  Linking up to Funky Junk's SNS143 here... , Miss Mustard Seed's Furniture Friday here, ...and here...and here...

Friday, July 13, 2012

Staying on task with junk...oh look a bird!

Well, as usual I haven't "actively" been working on repairing or redesigning any junk until this week. I generally get going on it after the 4th of July and after spending a delightful extra few days at the lake with kids, sibs, and good friends...I decided it's about time to get some dirt under my fingernails.

So I took a few days extra off work and my teenage son and I set out for the barn to see what trouble we could get in to.


Of course in our barn there are no longer cows or horses :( mulling around, but there's always still a multitude of animal activity to be found.  (Like the time I was out there late at night---all alone---and heard a ruffling unfamiliar sound coming from under a pile of solemn junk.  Then one, and soon another, salamanders gandered their way across the barn floor and out the door without giving notice to the fact I was there.  I was just thankful they weren't black and white with a fluffy tail!!  They proceeded to do this at about the same time every evening for a good week or so.  I was on the verge of naming them!)

However, this time was a bit different.   Throughout the day, I noticed not one, but 4 very young birds randomly appear on the grass near the door of the barn.  Unfortunately the dogs spied the first one and well, yeah.

So the moment I saw the second baby bird, my son and I immediately scooped  it up and put it temporarily in the safety of a bucket until the dogs would be in for night.  We dug it some worms, which it ate, and within a short time we had scooped up a total of three little fluffball birds.  All the while Mama (or Papa) Cedar Waxwing watched and chirped from the rafters...even scooping down into the bucket to feed the babies.


It was apparant they had taken flight a bit too early and we feared that putting them back in the nest would result in them venturing out again.  So at the end of the day we put them gently down on the floor of the barn and hoped for the best.


Morning came and there they still were.  Huddled together in the grass near the barn.  Not a favorable place when there's dogs around!  We scooped them up once again (A little more challenging this time, since they were on to our tricks.) and we placed them around the back of the barn inside a fenced area.


My son, who would usually rather be hunting than pulling nails and carrying projects around for me, actually admitted watching the baby birds and their situation was quite an interesting change from his usual interaction with the feathered kind.


All the while the Mama (or Papa) Cedar Waxwing had not given up on the babies...keeping them close in sight, feeding them, and singing to them as if to coax them to try harder at flight and get to a safer place than the ground.

I was relieved tonight to see they are still all there, and sitting atop a fence post.  I left them a treat of grapes and watermelon.  The stool has been waiting for it's turn at being given a fresh and junky look...so will have to wait a bit longer.


And the weathered wood all around me here has inspired a few project treatments.  I can't wait to show you the wood table top I'm "aging" to have this very same time worn appeal!


 So my son and I got a bit off task with the junk projects, but that's the great thing about being a junker.  We appreciate staying in tune with the nature and raw elements around us, using them to inspire and feed our creativity!


Tuesday, July 3, 2012

Sometimes the answer is black...or white!


Sometimes, people just don't have the same vision as you...

They do not see the potential in ceramic owls
 and gold "Home Interiors" finds...

They are not even remotely jealous
 that you found this owl and they didn't...  ;) 

They think they know WHY Donna took these to the thrift store

(Carol may not know...so MUM'S the word !)

THEY are non-believers in the power of paint...
Oh ye of such little faith!....

Neutral white or black paint can change ANYTHING!

Look at him now!
 White paint washed away the ugly but kept the retro charm...
 (How cute would this be in a little girl's room...against a pink wall?)
It's a nod to the 60's?...70's? 
But the white paint gives it a modern spin.
I have to say...I  love easy projects like this that really make a big transformation...
You may even find an owl similar to this at Anthropology these days...
***
  
Now how about those "Home Interior" pieces?


That clock popped right off... saving that for a future project...


With some black paint and a round mirror, this gal will be transformed!
Black (or any color really) will put a modern spin on all of that victorian-like scroll work...


And this mirror ...I am LOVING the view!!...but, again,  not the gold coloring!


A little black semi gloss paint...


(Left this awesome stencil image)


...and makes the pieces look less plastic, less Home Interior,
and can be the starting point for a wall of mirrors like these:


And how awesome is this!?

 
I never thought I'd say it, but "Home Interiors" just may be making a comeback!
YIKES...
Is the world coming to an end!?

;)

Have a Happy 4th!!!


Linked to:

Met Monday

Thursday, June 28, 2012

Vacancy!


Calling all junkers, artisans, and vendors of curious goods!  The 8th Annual Autumn JunkFest & Flea Market will be here
 whether we're ready or not ...before we know it! 

We're looking for vendors who want to join the frenzy that is JunkFest! Do you have any cool goods,
treasures, or trinkets that you'd like to share?

 
Hand crafted items welcomed!


Unusual, quirky, innovative stuff? Yep, we'll take that too!


This year's sale is Saturday, September 8th from 9am to 3pm.  For vendor contact information, click the "contact" tab on our home page.


           But hurry!  Spaces are filling fast!  Ya snooze, ya lose!


Tuesday, June 19, 2012

Quirky Tablescape

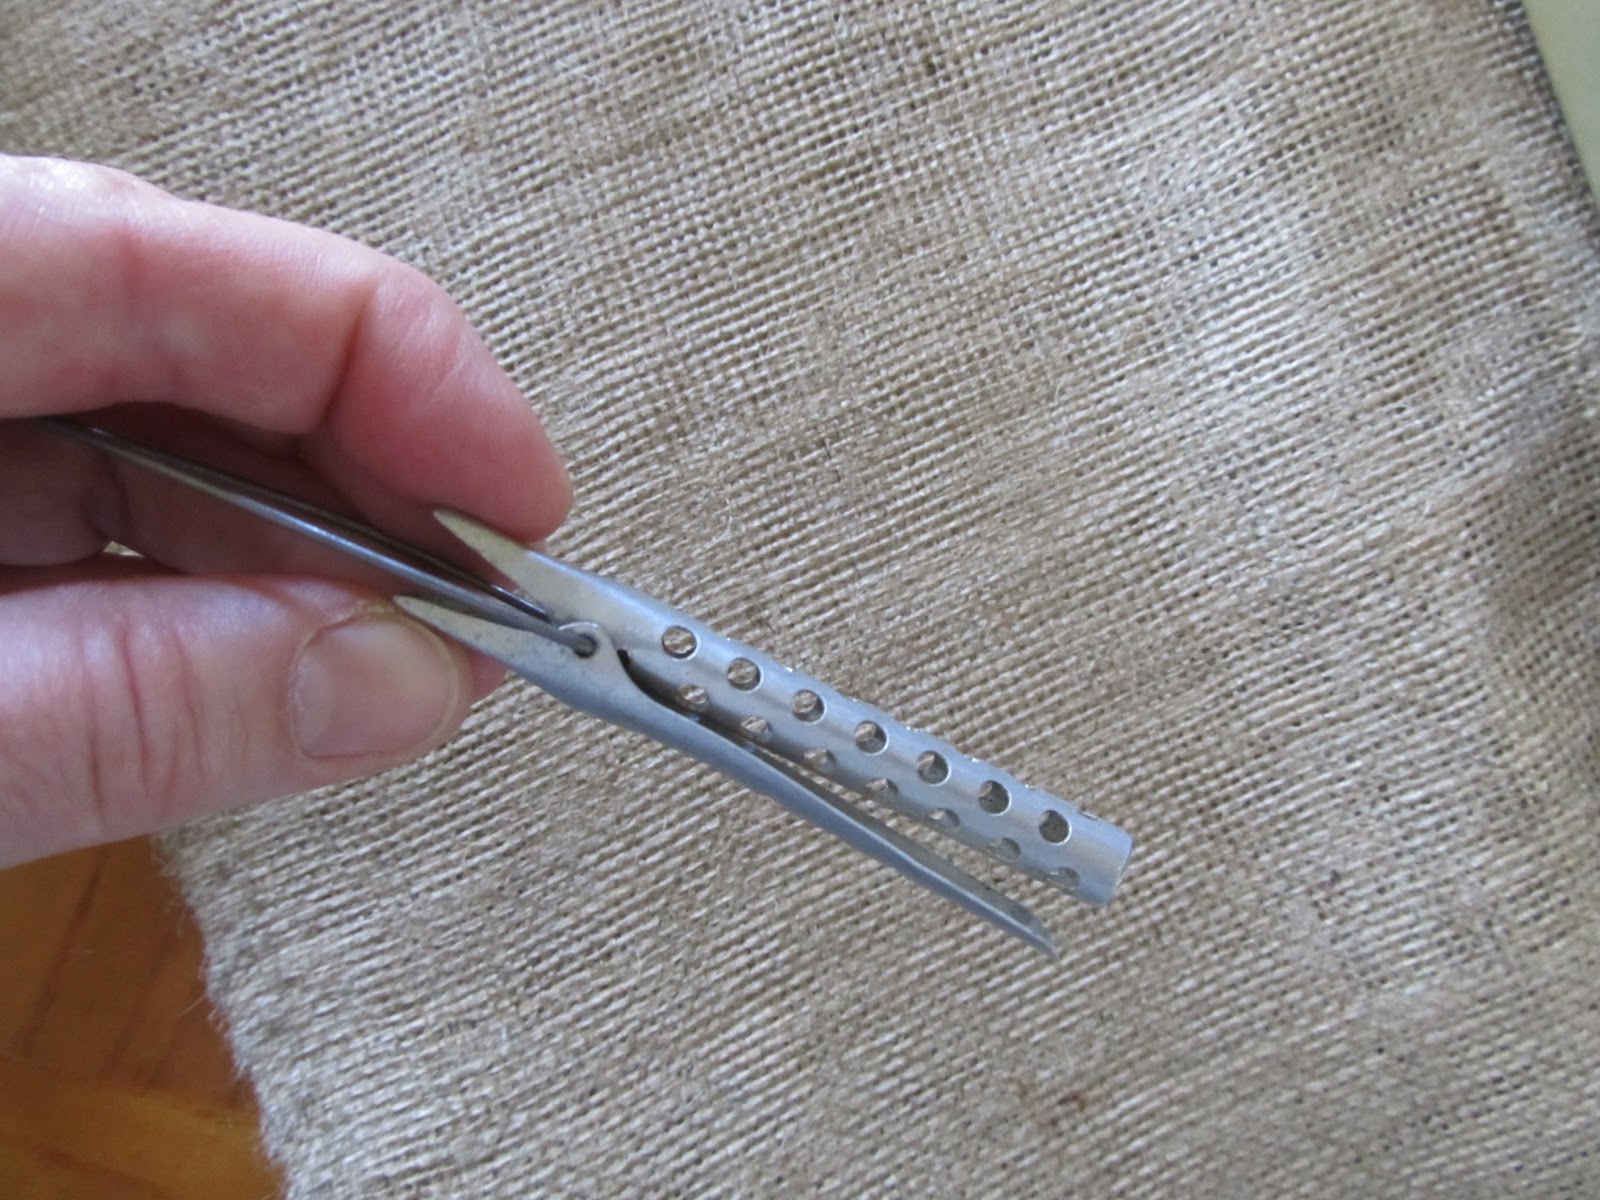
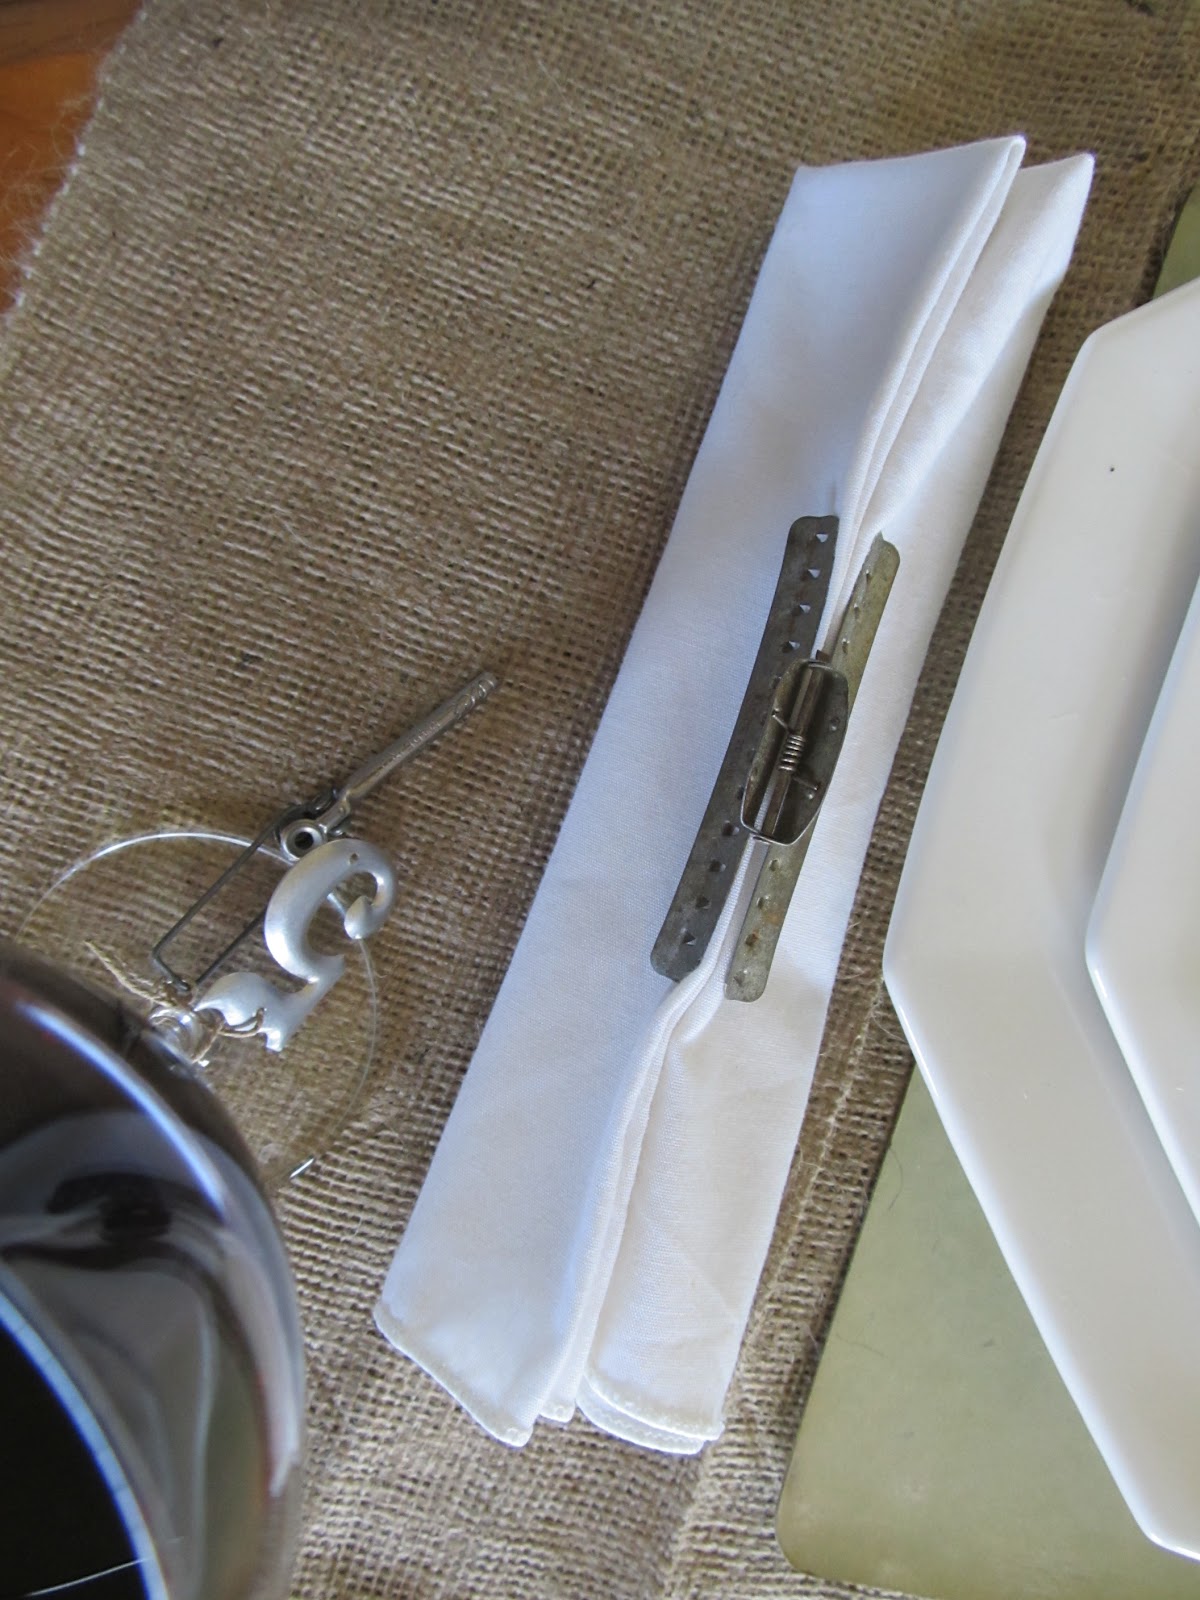
Thought I'd share a simple tablescape I threw together a couple of weekends ago on short notice. Earlier this spring I received some cool vintage hair clips and curler rods and decided to incorporate them in the place settings....yep, this post is entitled "Quirky Tablescape", after all!
Love 'em!

(I'm actually thinking these would also be cool on a Christmas tree holding some vintage photo's or ornaments!)  For now, they will be wine charms!
 The clips were used to hold the napkins


I used some old file drawer dividers as "chargers" for a little industrial feel.


Love the white, burlap and tarnished silver together...

 I used a photo of each guest at their place setting.  Since my guests were all relatives, it worked well since I had  photo's of everyone.
They weren't surprised by my junky, quirky table!

Linking up today to Faded Charm - a great blog!

Monday, June 4, 2012

Etching made easy!

Hello!  It's Monday and time for a weekend project review!
 I decided to try my hand at etching.  Sweet Melissa and I took a class a couple summers ago, and I'd never tried it since.  I found some glassware at the thrift store, and realized if my idea didn't turn out, hey, I wouldn't be "out" alot of money. 
These are the glasses I found.  Aged to perfection.
After taping off the desired area for my "design" (and I use this word lightly) I added various letters, symbols and numbers from my scrapbooking stash.  No particular order, but I tried to space them about the same distance apart.
Once the stickers were on, I followed the directions on the Armor Etch Cream. The cream was applied very thick as recommended.
Like I said...put on quite thick.
Left on for about a minute, and washed off the cream in warm water...I love the way they turned out - none are the same!
They are perfect for a cocktail or an ice cream sundae - I'm lovin' them so much, I may try to do more!
Related Posts Plugin for WordPress, Blogger...