
After participating in SYTYCD, I found myself a tad burned out on posting. I hadn't realized what deadlines for posts would do to my "spare" time. In fact, I soon found that I no longer HAD spare time because if we weren't taking photos and writing posts for the contest...we were linking to linky parties and trying our best to keep the blog fresh. It gave me a new respect to those of you who keep your blogs changing often to keep us entertained and inspired!! And for those of you who take little breaks from time to time...WE UNDERSTAND!! Blogging is for inspiration, but not a necessity of life!! Okay, maybe most of us NEED a blog fix once in a while, but...you know what I mean!
Back to the contest...I really hope you've all been keeping up with it and voting! There's some serious talent and dedication to be found there! Now, mind you...JunkFest is no longer in the running for the contest, and that's okay, but there was one week's challenge I was SO looking forward to...
PAINT.
So I'm going to share my version of the challenge with you anyway!!
The screen door I'm about to bring you has some serious core value. I got it from a sweet lady who now lives on a farm my Mom used to work at when I was very very young! How cool is that!!! It had seen it's better day, but with enough effort, we can revive the old and withered...most of the time. ;) Right?! Kind of like fashioning a console table out of a wood cheese box... (some of you know what I mean!)


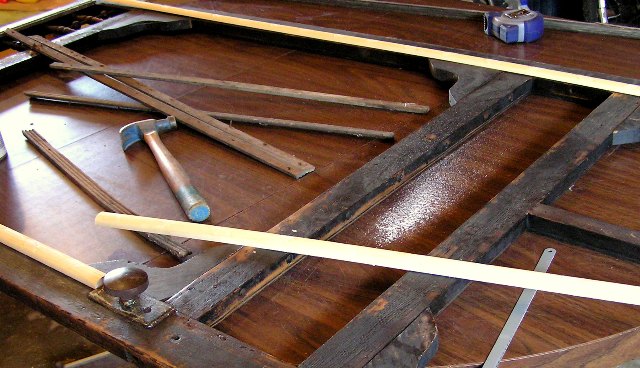
Way back when, I showed a preview of this door HERE. It took me a good long while to dig in and get it home ready. And it wasn't pretty. I started by removing all the old screen which resulted in losing most of the trimwork, then a good scrubbing or two. Light sanding followed, but not rough enough to lose the black finish.
Next I added some trim and spindles (some new, some borrowed from other doors).


Then to warm up the black, I rubbed a coat of my favorite stain over the entire door, then polyurethane. (this is NOT a product endorsement.)


Things were looking good. I cut some masonite panels for the bottom, which you'll see soon. Then added screen to the top.
Problem.
The door's new purpose was to HIDE the garbage, and the screen didn't cut it.


Plan B.
"B" for Burlap!!
Love it. Much better, don't ya think?

Now on to the tutorial portion of this post. (I'm a bit windy, aren't I?) The masonite panels to fill the bottom openings served more than one purpose.
1. Keep the dog OUT of the garbage.
2. Look fabulous.
I started by giving them a coat of black paint, then with stencils borrowed from all my junk sistas, I began to fill them up with the sweet spellings of my fave tasty beverages.
First I drew out the "plan" by outlining the stencils with pencil. This way I could be sure the spaces of the panels were filled and balanced.


Once content with the layout I came back with the stencils and stippled on a soft rusty tan paint.

I light sanding to add some age...and WaaLaa!!

Then to balance out the kitchen, since there are two storage areas, I had another old black door that I simply added a masonite panel treated with chalkboard paint.

 It's a FINE place for aspiring artists to do their magic!!
Linked to: SNS #28

ADORABLE! I LOVE screen doors and what you've done to yours is sooo cool! Does it slam too? :)
ReplyDeleteDonna
Love this, I have been wanting a screen door, love what you did with this one. And as Donna asked, Does it slam? I love the sound of that!
ReplyDeleteI adore your door!!! This project would definitely get my vote for the "paint" part of the contest. Fab job on the stencils!
ReplyDeleteSlam?! HAHA you two are soooo funny! Actually the knobs are all for show. I had to use magnets as door catches on both doors. That's working well, but is a bit more like a "tink" than a "slam". :)
ReplyDeleteMissy
...a-DOOR-able!!!
ReplyDeleteLove the tute and pics too! Not only do you get elbow deep into your amazing junk re-do's...you take the time and efforts to photograph each step! Phew...makes me sweat just thinkin'.
You will have to walk me through just how you are able to get so many pics on one posting. We need to get together. Howz about...Saturday? ;D
Dang, we should have used this project for the contest OLD theme...we'd still be in the running!! Oh well. This screen door project is awesome and I love everything about it - the burlap, black paint, stenciling, molding details, etc! Still don't know how you got the stenciling so perfect? Oh, I guess it's called "talent"!! ;) Great post girl!
ReplyDeleteAWESOME!!! Theresa
ReplyDeleteDang it...this is so cute and I just passed up a similar door because the vendor at the flea market was MIA for the day. I really wanted to throw money on the table and run off with the door, but even the price was MIA. Sigh...great job, love your talent!
ReplyDeleteBlessings,
Cindy
I CANNOT believe that is the same door...were you & I together over by my neighbor's picking up doors? This is the one I would have thrown in the burn pile!! You have more patience for the "unloveables" than anyone I know!
ReplyDeleteps...I see a budding artist in the works!!
Can I come to your week long junk-training-program? I'll bring my own sleeping bag. And my sourdough starter. And I promise I only snore a teeny tiny bit!
ReplyDeleteUNBELIEVABLE......well done!!! This is awesome!
ReplyDeletexojanis
Love the 'before' pics, love the door make-over especially the bottom half, and love the tutorial, heck I just love it all!!!
ReplyDeletegreat idea for the screen door. the burlap, the painted panel... too cute!
ReplyDeleteGoing off what Donna said... I think it should slam. You just need to add a spring.
I love the sound of a slamming screen door.
Great project.
Wow--love both of the doors! The panels are amazing!
ReplyDeleteWow Missy, LOVE IT!!!
ReplyDeleteOMG Thats amazing!! I need to get into restoring small things! Thats just so clever!!!
ReplyDeleteThat door is just all-around awesome!
ReplyDeleteI absolutely love what you did with it, now I have some serious screen-door envy here.
Have a wonderful Thursday!
Anne
You did amazing work! I turned my screens, more like window screens into message boards. Thought the screen was metal, but wasn't, so glued magnets to the back and was able to then make fun magnets to hold things on the front. Not as much work as yours, though....beautiful!!! thanks, deb++++++++++++++++++++++++
ReplyDeleteJust too cool!! LOVE it!!
ReplyDeleteWOW!! Great projects and what great job with those stencils!! Might have to keep our screen door that was for sale. Love them both!!
ReplyDeleteWhat a great door transformation and love the springs in your other post. I can also tell your house is just gorgeous from the small snippets I can see. Hope you have a great weekend, Theresa
ReplyDeleteToooo Koool! Love your ideas - the bed springs are wonderful! Jennifer jennsthreegraces come visit!
ReplyDeleteGreat job Missy. It turned out just great.
ReplyDeleteGretchen
Nice screen door! I have one I picked up when I first moved to Oregon for $20. Lots of character, but lots of layers of paint too! (Probably lead!) Rusty screen. Original hinges and handle.
ReplyDeleteI'm inspired by you to just-do-it already!
Visiting from Funky Junk
ps. The chalkboard door is nice too!
This is totally wonderful!
ReplyDelete~AmyLynn
Your screen door is aDOORable! I love the panels you did for the bottom. You must have a steady hand!
ReplyDelete