Who in this world doesn't love chippy frames all worn and tattered?  Sigh.
Sigh.
Sigh. The photo didn't fit any frame I had.
Turns out, that was a good thing.

 It looks a bit like it's "floating".Sigh.The photo didn't fit any frame I had. It looks a bit like it's "floating".

But.... *sigh* .... look at the condition of the drawers.
 I had to toss my thoughts around for awhile on this one. I hated to take those lovely carved drawers out of the picture but despise repairing them at the same time.
This brings me to a perfect reason to link this post to Miss Mustard Seed and her Copy Me Challenge. Even she has to toss drawers aside from time to time. Read about her situation HERE.


The BLUE was fabulous on the dresser, but I wanted a deeper, richer...you know, more of an aged look. So I used a stain to "glaze" over the blue paint.
The next fabulous thing I discovered was the planking that made up the inside of the dresser. Ooh Laaa La!
 I installed a shelf and stained the inside. Was totally LOVING the dark stained look. But I was still searching through my stash for the perfect solution for shelving for the top drawers
If you search long enough...the solution will appear. I've had a few very water damaged pressback chairs in the corner of the barn for a few years now. The only thing salvageable on them were the backrests, and it seemed a perfect solution to cradle a few bottles of wine.
I put a divider between them so the fit would be nice and snug.

 (photo credit: Jennifer Hagemeister)
 (photo credit: Cindy Willey/Megan Ockert)
Sometimes it's SO hard to let a piece of furniture go after creating. I almost swapped the blue (used to be dresser) wine hutch out with the one below that I made a few years ago. Almost. The stained (used to be dresser) wine hutch won in the end and is still in my house.

 First, start with a great old wheel from a child's bike, a tire from a wagon, tricycle, etc...
 Dab on a little Gorilla super glue - the stuff is awesome and I use it for a million things. It dries clear too, so that's a plus.
 Center your plate (I chose clear glass because I still want to see the wheel through the plate), and press down for a minute or so until the glue dries.
 Hope you're having a funky junk-filled kind of week!
 See the before...
 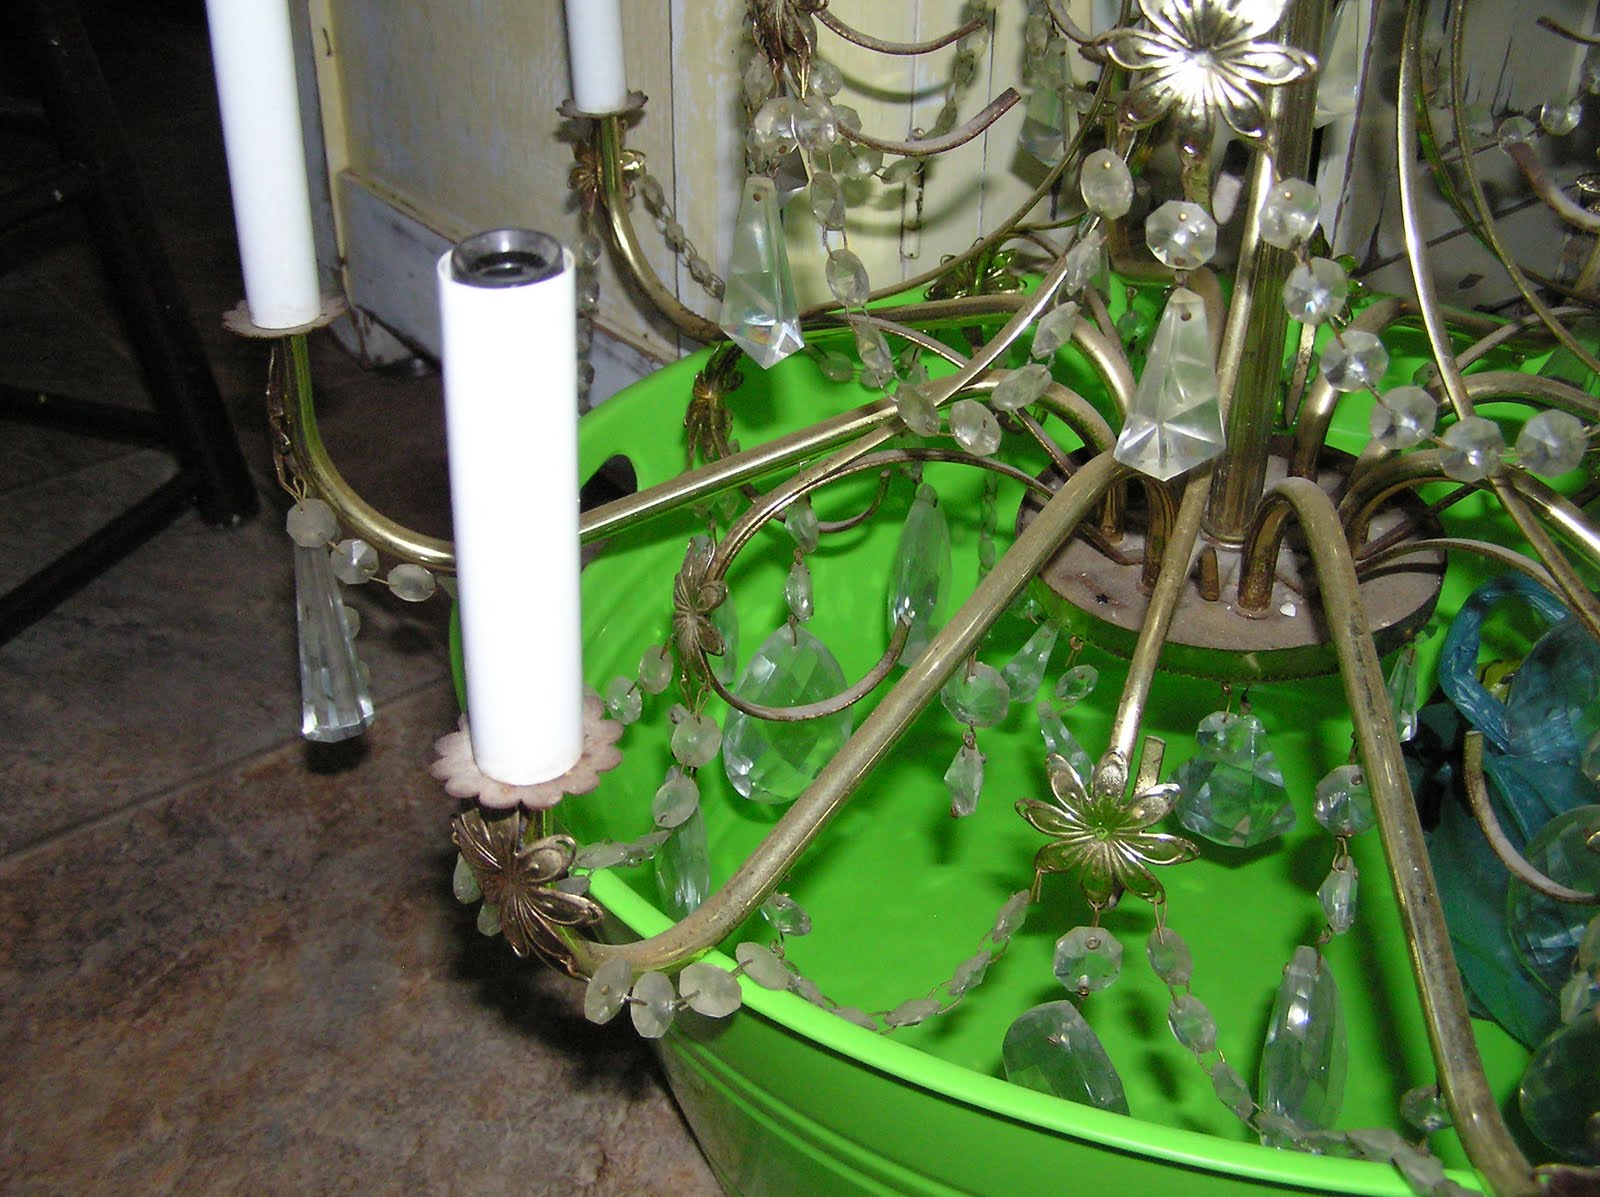 I carefully dismantled the chandelier, taking all the crystals off and soaking them. Then scrubbed each and every one with a toothbrush. I sorted them all out on a towel, counting to make sure I could create a balanced look as I put them back on the chandy.


I hope you don't mind...this is a bit of a repost, but I just couldn't resist sharing AGAIN!!
There really isn't anything soft and cozy about a hefty piece of burlap, is there? But the charm I believe, comes from the unspoken history of a well used burlap scrap.
I had an awesome large frame and this burlap bag made the perfect fixins for a stylin' memo cork board. And functional?! Don't ya just wanna drool all over this mattress and those pillows?
 I just HAD to keep one of these bags for ME, ME, ME! I love it like I love my SaWeet Screen Door!! Check out the screen door post HERE.


Here are the two columns I started with. Don't they just scream "fireplace!" to you? After taking apart the columns, only to discover that 2 of the 4 sides on each had a one inch lip sticking out, I sawed off the lip so that the boards would lay flush side by side.

Next, I layed the boards out flat to determine the width of the mantel....and hope like heck I had enough to make this work! Sketches, rough drafts......even measuring were not part of my plan at this point. I was working purely from the vision in my head...and eyeballing as I went along.
I don't really recommend this, it's just how I roll sometimes.

Next, I flipped the boards over and secured them with some horizontal planks. So far, so good.
After adding the sides, I trimmed the top & bottom and added a thick piece of plywood for the back. Then (this time I measured) I cut the opening in the front. It appears as though the opening is a bit small, but I still had a decorative element to add above it.
 Dry fit the mantel, eyeballed some more....looking pretty good. Attached the mantel and a beefy corral board for the bottom. After darkening the top & bottom with a "secret" stain/paint formula, I added the metal fleur de lis to the front to "French" her up a bit.
And there you have it! A chippy-white, faux fireplace mantel.

If you're looking for more "white" inspiration, head over to CSI this week! Just click on the button below. Thanks for stopping by!

 The dessert area began with greenery and this decorative door which was a "save" from a piece of disgarded furniture. (Just goes to show a junk girl shouldn't throw anything away as a good "use" for an item usually presents itself later on...!)
 A no-longer working clock was taken apart and the face was the perfect platter for the main dessert...sitting on a silver base for some height.
 A while back when my junk sisters and I were out junkin', I found these old round Bristol Recorder charts. They worked just right as placemats.


 This recently found two-piece silver dish was used to hold the ice cubes for drinks -


 I wish to sit with my girlfriends in those rattan chairs and order a glass of wine and a


